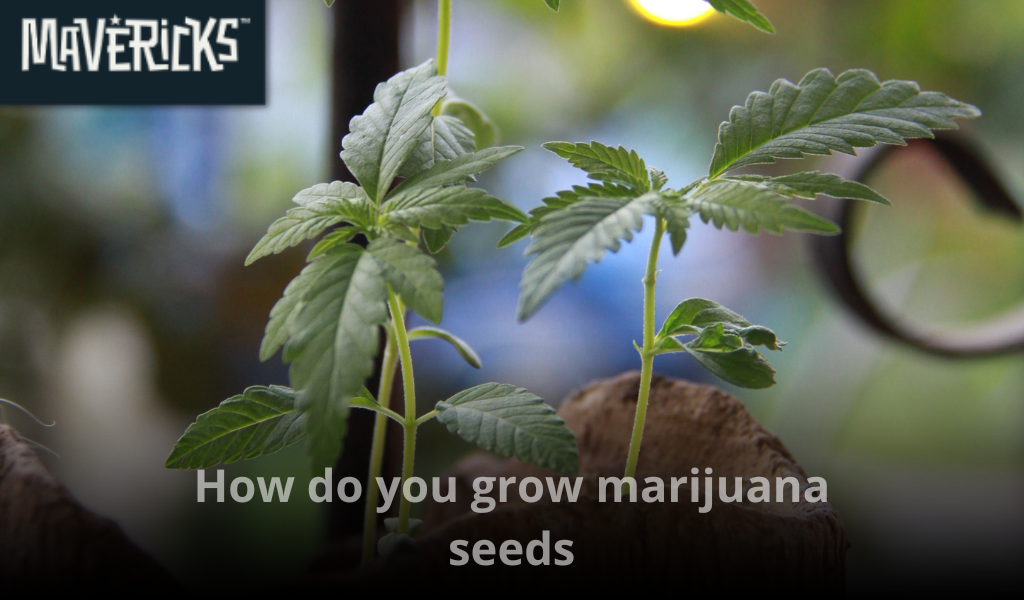
Growing marijuana from seed is one of the most rewarding processes for any cannabis cultivator. Whether you are growing for personal use or launching your first home grow, knowing how to properly germinate, plant, and care for your cannabis plants is essential for a successful harvest.
In this complete guide, we’ll walk you through every step of growing marijuana from seed, from choosing the right strain to drying and curing your buds. If you want to get the most out of your seeds, follow these proven techniques trusted by expert growers.
At Mavericks Genetics USA, we provide premium marijuana seeds with stable genetics, high germination rates, and proven performance. Whether you’re growing feminized, autoflower, or photoperiod strains, this guide will set you up for success.
Step 1: Choose the right marijuana seeds
Before you can grow, you need to start with the right genetics. Your choice of seed will determine the plant’s growth pattern, potency, yield, and resistance to pests or disease.
Types of marijuana seeds
-
Feminized seeds: Produce only female plants, which grow buds. Ideal for beginners and those wanting maximum yield without identifying male plants.
-
Autoflower seeds: Automatically flower based on age, not light cycle. Perfect for quick harvests and discreet grows.
-
Photoperiod seeds: Require a change in light cycle to trigger flowering. Offer more control and usually higher yields.
What to consider when selecting seeds
-
Climate and environment (indoor vs. outdoor)
-
Desired effects (indica, sativa, or hybrid)
-
Grow difficulty (some strains are more forgiving than others)
-
Harvest time (autoflowers are faster, photoperiods may take longer)
Browse premium options at Mavericks Genetics USA to find seeds tailored to your grow style.
Step 2: Germinate your seeds
Germination is the process of getting your seeds to sprout and begin growing. It’s the first sign of life and a critical moment in your cannabis plant’s development.
Best germination method: paper towel technique
-
Soak your seeds in water for 12–24 hours.
-
Place them between two damp paper towels on a plate.
-
Cover with another plate or plastic wrap to retain humidity.
-
Keep in a dark, warm place (70–80°F or 21–27°C).
-
Check daily. Once the white taproot appears, they are ready to plant.
Avoid direct handling of the root. Use sterilized tweezers to place the seed gently in the grow medium.
Step 3: Plant the germinated seed
Once the taproot is about 0.5–1 cm long, it's time to place your germinated seed into its first container.
How to plant correctly
-
Use a light, airy medium like seedling mix or coco coir.
-
Create a small hole about 0.5–1 inch (1.3–2.5 cm) deep.
-
Place the seed taproot down, pointy side down.
-
Cover loosely and mist with water.
-
Keep in a warm, humid environment with indirect light.
Avoid overwatering and do not bury the seed too deep. This ensures your sprout reaches the surface without exhausting itself.
For a detailed planting guide, check our article: How deep should you plant a germinated marijuana seed
Step 4: Seedling stage (Days 1–14)
Once your seedling emerges, it enters its most delicate stage. It will develop two small leaves called cotyledons, followed by its first true leaves.
Key care tips
-
Use a small container with drainage.
-
Light: 18–24 hours of soft light per day.
-
Temperature: 70–78°F (21–25°C)
-
Humidity: 60–70%
-
Water only when the top inch of soil is dry.
Avoid feeding nutrients at this stage. The seed contains all the energy needed for early development.
Step 5: Vegetative stage (Weeks 2–6)
This is when your plant begins rapid growth. Roots spread, stems thicken, and leaves multiply. Proper care during this phase sets the foundation for big yields.
Indoor vegetative setup
-
Light: 18 hours on, 6 hours off (minimum)
-
Temperature: 72–82°F (22–28°C)
-
Humidity: 50–70%
-
Pot size: transplant to a larger container (1–5 gallons)
Nutrients for veg stage
-
High nitrogen (N)
-
Moderate phosphorus (P)
-
Moderate potassium (K)
Water when the top 1–2 inches of soil are dry. Always pH your water to 6.0–6.5 for soil and 5.5–6.0 for hydroponics.
Step 6: Flowering stage (Week 6 onward)
The flowering stage is when cannabis plants start producing buds. Autoflowers will enter this stage automatically, while photoperiod plants need 12 hours of darkness to trigger flowering.
Flowering requirements
-
Light: 12 hours on, 12 hours off
-
Temperature: 65–80°F (18–26°C)
-
Humidity: 40–50%
-
Nutrients: Lower nitrogen, increase phosphorus and potassium
Avoid light leaks and stress during this time, as they can cause hermaphroditism or reduce yield.
Step 7: Monitor and manage growth
During the flower phase, monitor for:
-
Nutrient deficiencies (yellowing leaves, spotting)
-
Pests (especially spider mites or aphids)
-
Mold or mildew (keep airflow strong and humidity low)
Support heavy buds with plant ties or stakes, especially in later weeks. Trim lower foliage to improve airflow and light penetration.
Step 8: Harvest your marijuana plants
Knowing when to harvest is essential to getting the best flavor, potency, and effect from your cannabis.
Signs your plant is ready
-
Pistils darken and curl in
-
Trichomes turn from clear to cloudy or amber (use a jeweler's loupe)
-
Leaves begin to yellow naturally
Harvest too early and you lose potency. Wait too long and THC may degrade into CBN, making effects more sedative.
Step 9: Drying and curing your buds
Drying and curing enhance aroma, flavor, and potency. Rushing this process can ruin months of work.
Drying process
-
Hang buds upside down in a dark room
-
Temperature: 60–70°F (15–21°C)
-
Humidity: 45–55%
-
Dry for 7–14 days
Curing process
-
Place dried buds in airtight jars
-
Store in a cool, dark place
-
Open jars daily for 10–15 minutes (burping)
-
Cure for 2–4 weeks minimum (some go longer)
Well-cured cannabis is smoother to smoke, richer in aroma, and longer lasting in storage.
Common beginner mistakes to avoid
-
Overwatering: Leading cause of seedling death.
-
Poor lighting: Causes stretching and weak growth.
-
Wrong pH: Nutrient lockout can stunt growth.
-
Ignoring pests: Small problems quickly become infestations.
-
Harvesting too early: Reduces cannabinoid and terpene development.
Growers who take the time to plan, observe, and adjust will see significantly better results.
Autoflower vs photoperiod: Which is best for beginners?
|
Feature |
Autoflower |
Photoperiod |
|
Light cycle |
18/6 throughout |
Needs 12/12 to flower |
|
Grow time |
8–12 weeks total |
12–20 weeks |
|
Yield |
Medium |
High |
|
Size |
Compact |
Can grow large |
|
Ease of use |
Very beginner-friendly |
Requires more control |
Autoflowers are often the best choice for first-time growers due to their simplicity and speed.
Explore our top-selling autoflower and feminized seeds at Mavericks Genetics USA.
Indoor vs outdoor growing
Indoor
-
Total control over light, humidity, and temperature
-
Discreet and secure
-
Year-round growing
Outdoor
-
Lower setup cost
-
Natural sunlight produces large yields
-
Dependent on season and weather
Your choice will depend on space, budget, and local laws. Both can produce excellent results with quality seeds and attention to detail.
Legal considerations
Always check your state or local laws before growing cannabis seeds. While many U.S. states have legalized personal cultivation, some still restrict the number of plants or require medical cards.
At Mavericks Genetics USA, we sell seeds as adult novelty souvenirs and encourage customers to comply with all applicable laws.
Conclusion: Start strong, grow smart
Growing marijuana from seed requires patience, attention, and the right setup—but the reward is worth it. By choosing stable genetics, following each stage carefully, and responding to your plants’ needs, you’ll be well on your way to a satisfying and potent harvest.
If you're ready to start your first grow or want to upgrade your genetics, trust Mavericks Genetics USA for reliable, tested, and high-performance cannabis seeds.
Would you like a version of this guide in Spanish as well?
Share:
How long can marijuana seeds be stored
How deep to plant a germinated marijuana seed